Computing Normal Vectors on Raymarched Objects
- Weston McNamara
- Apr 25, 2021
- 5 min read

Updated: Oct 18, 2021
For people without experience in graphics or shader programming, learning a technique like raymarching in an application like ShaderToy can be quite confusing, and can still even be challenging for people with previous experience.
The math is not immediately intuitive to someone who has no experience with shader programming, and the goal of this article is to explain an aspect of raymarched shader programming that is often extremely difficult to understand.
This aspect would be generating normal vectors in a fragment shader for raymarched objects.
To get the most from this, you should know how raymarching works on a basic level. If you don't know what a signed distance function is yet, then this may be quite confusing.
Two raymarched spheres with normals generated in the fragment shader.
In shaders like these, it is common to see code similar to the function below being used to generate a normal vector at any given point p.
For example, something very similar to the code below was used in the "Ray Marching for Dummies" tutorial by The Art of Code.
vec3 genNormal(vec3 p)
{
  float d = sdfScene(p); //very close to 0

  vec2 e = vec2(.01, 0.0);

  vec3 n = vec3
  (
       d - sdfScene(p - e.xyy),
       d - sdfScene(p - e.yxy),
       d - sdfScene(p - e.yyx)
  );

  return normalize(n);
}
It is a very good tutorial, but unfortunately how this function works is only brushed over, and he does not explain how exactly this works other than "this samples points around the surface to get the slope at a given point", which isn't a very good explanation either unfortunately.
You may also hear that it calculates the "derivative of the surface slope" or something similar, but this often confuses people even more because the result of a derivative is tangential to the surface, and not perpendicular, like a normal vector should be.
So what is it doing?
Basically, in short we're sampling points around a specific point, and then using that data to find where the difference changes the fastest. Because a normal vector is perpendicular, and moving along a perpendicular line from a surface is the fastest way to move away from a surface, finding this fastest difference from the surface will give us our normal vector.
If that doesn't make much sense right now, don't worry. The explanation below should help as well. Lets begin by drawing a diagram.

In this image, we have a sphere as outlined in black, and a point that we need to generate a normal vector at, outlined in red.
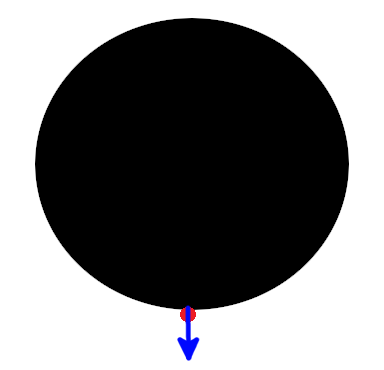
Hopefully you remember that the normal vector is perpendicular to the surface it is located at, so to help visualize what we are trying to generate, I have drawn the desired normal vector in blue.
Next, I will show how we arrive there, from that weird looking function from before.
To do this, I will visually graph each variable, and explain each line of code along with it.
Lets begin with this line, and move from there:
float d = sdfScene(p); //very close to 0Here we get the distance from the given point to the scene.
The function sdfScene simply takes a point, and returns a distance from that point to the closest surface of an object. In this example, it is the distance from any point to the surface of the black circle.
In this case, this is just the distance between the red point, and the surface of the black circle. Because the point is generally very close to the circle (but may not be exactly right if your signed distance functions are not perfectly accurate), this value is very close to 0, as stated by the comment. This value is almost never over 0.1, and is usually smaller.
vec2 e = vec2(.01, 0.0);This one is tricky to understand without a bit more context. In short, this is the small offset that is used to sample points around our given point, that we can use to determine the normal vector. We'll see this more in the next few lines.
vec3 n = vec3
(
       d - sdfScene(p - e.xyy),
       d - sdfScene(p - e.yxy),
       d - sdfScene(p - e.yyx)
);

return normalize(n);
Now what the hell is this thing? How does this generate a normal vector? Lets break it down.
First of all I want you to take note at the three lines subtracting our e variable, and what that is actually doing. More in specific, this part:
p - e.xyy //sample around x axis
p - e.yxy //sample around y axis
p - e.yyx //sample around z axis
In short, this is "sampling" the points around our main point, p. First it samples around the x axis of the point, then the y and then the z.
It does this by subtracting our little offset in the e variable from each axis of our p variable. If you are confused about the xyy, yxy and yyx parts, you may need to read this article on swizzling, which is an important feature in GLSL and most other shading languages. https://www.khronos.org/opengl/wiki/Data_Type_(GLSL)#Swizzling
Visualized, these three lines of code will look something like this. The result of these subtractions are highlighted in green, with our original point in red.
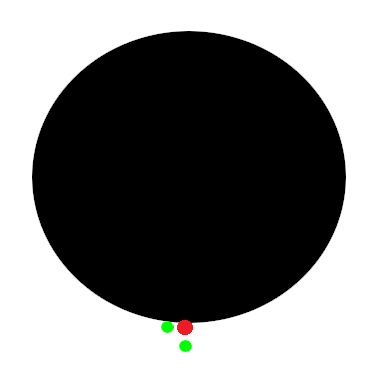
You may have already noticed that there is not a third green point for the z axis. This is because it would be hidden behind the red point, because the z axis goes into the screen.
Now lets move back to the code we had before.
d - sdfScene(p - e.xyy),
d - sdfScene(p - e.yxy),
d - sdfScene(p - e.yyx)

return normalize(n);
Why does adding d - sdfScene to each line give a normal vector? Because this will give us the direction that the distance changes the quickest, which as you may remember from the beginning of the article, is also the direction the normal vector points in. That may still be confusing, so I will explain further.
Lets visualize this again. I will draw the distances to the scene in blue. This diagram showcases the result of this part of the code.
sdfScene(p - e.xyy)
sdfScene(p - e.yxy)
sdfScene(p - e.yyx) 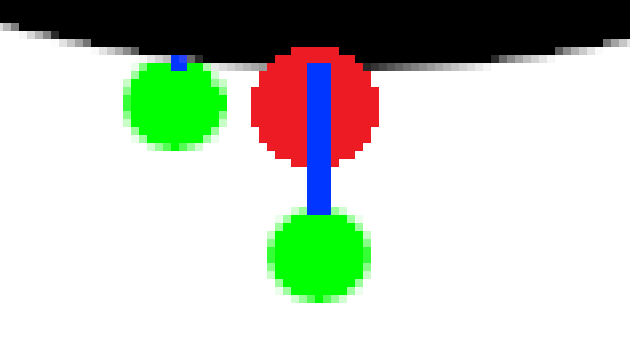
As you can see, the distance to the surface is pretty big on the center green point, but very tiny for the one on the left. It is almost 0. You can barely see it! The third point that is supposedly hidden behind the red point in the z axis is quite close to the surface as well, though we cannot see it because it is hidden behind our red point. That middle green point is definitely the largest distance.
Now lets subtract the distance from the red point to the scene. (represented by the variable d.) The full code for the next visualization is as follows.
d - sdfScene(p - e.xyy),
d - sdfScene(p - e.yxy),
d - sdfScene(p - e.yyx)
The result of subtracting these two variables will be shown in pink. It is zoomed in because this value is quite small.
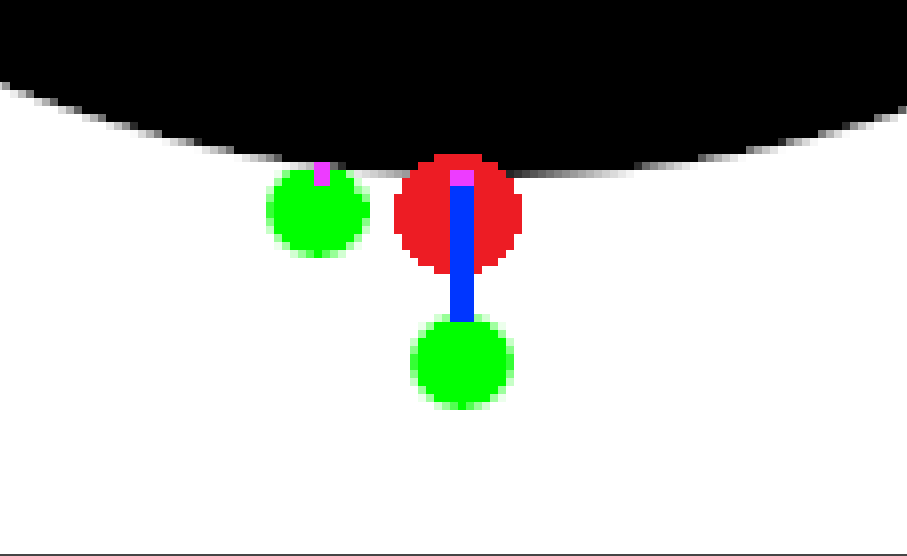
As you can see, this subtraction completely cancels out the distance from the scene on our left point, and keeps almost all of it on our middle point. We cannot see the z point behind it, but it will cancel all the distance there as well, similar to the leftmost green point.
So now after subtracting, we have cancelled out two of those blue lines, and only one blue line is left as shown below.

This blue line just so happens to perfectly align with our normal vector. The magnitude of this vector is not 1, so we normalize it at the end, like we should with any normal vector. We can then return that value, as it is the correct normal vector.
return normalize(n);Ending
This method is REALLY confusing, and it took me days to truly understand whats going on here, so don't get discouraged. If you're still confused, I recommend the following steps:
Reread the article a few times
Draw the diagrams yourself while following along with the code.
Get in contact with me with the email in the page header.


Comments